Essential Gear List for Successful Wild Camping and Backpacking
What to pack for a successful wild camping or backpacking trip? The chances are that you have already found out that people get very passionate about their camping gear. The materials, weight, size, brands – everything goes. There are people out there that have made camping into an art form! If you are not quite at that point yet – and just want to build a good basic gear list for wild camping – this post is for you! I will go through my wild camping gear list and the items I would not camp without. My kit is by no means the lightest or the most technical – but neither is it too expensive or too hard to find. This is gear that I have found reliable and that has worked for me for years camping and hiking all over the UK and abroad!
Essential Gear List for Wild Camping:
- Backpack, usually Osprey Ariel 55 AG
- Tent, MSR Elixir 2
- Sleeping bag, Mountain Equipment Helium 800
- Sleeping mat, Vango
- Stove (Jetboil), gas & lighter/matches (usually both in a waterproof bag)
- Spoon, bowl & mug (+ a little sponge for dishes)
- Penknife
- Small first-aid kit
- Headtorch (Alpkit Viper) & spare batteries
- OS map for the area & map case
- Compass (Silva Expedition 4) & whistle
- Nalgene 1l water bottle (if the forecast is warm also a 2l hydration bladder)
- Water purification tablets (or a water filter)
- Clothes (more about these below)
- Food
- Toiletries (like sun cream) & any medications you need
- Toothbrush & paste
- Trowel & toilet paper
- Ziplock bag(s) for rubbish/used toilet paper
- Phone, money/card
Here it is – my complete list of wild camping gear! Looks pretty simple, right? For a longer or a shorter trip, the only thing I adjust is the amount of clothes and food. And maybe add a power bank or similar to charge my phone on longer trips.
Here is a more in-depth look at the different aspects of the gear list, which you should have when heading wild camping:
It All Starts With a Backpack
Having a rucksack that fits both you and your gear is essential once you start to go out regularly. But if you are just trying things out, don’t worry about it too much. As long as you can carry your kit to your camping spot, you’ll be fine. There is sometimes an odd sense of competition in wild camping circles for who has the lightest backpack. I find this irrelevant. Especially on longer trips, your comfort is more crucial. But, of course, finding the right balance of weight vs. comfort is the key! The backpack should fit well regarding the back length but the shape of the shoulder and waist straps is also important.
The size of the pack comes largely down to your gear. It is nice to have a bag that is big enough to comfortably fit everything. And still, have a bit of extra space for spare layers and extra snacks. And if you end up packing in the rain one morning – the last thing you want to do is take ages trying to fit everything into the backpack. For me the 55l Osprey Ariel AG is ideal. Osprey has put a lot of effort into designing female-specific rucksacks, their bags are durable and the Anti-Gravity weight carrying system is great especially for longer hiking trips. Personally, I also love the fact that this bag comes with a lot of pockets for organising your things and many of these you can access while walking.
How to Choose the Right Sleeping System?
A camping sleeping system includes your tent, sleeping bag, and sleeping mat. (Or a hammock or bivvy system, if you that way inclined.)
How to choose the ideal tent for wild camping?
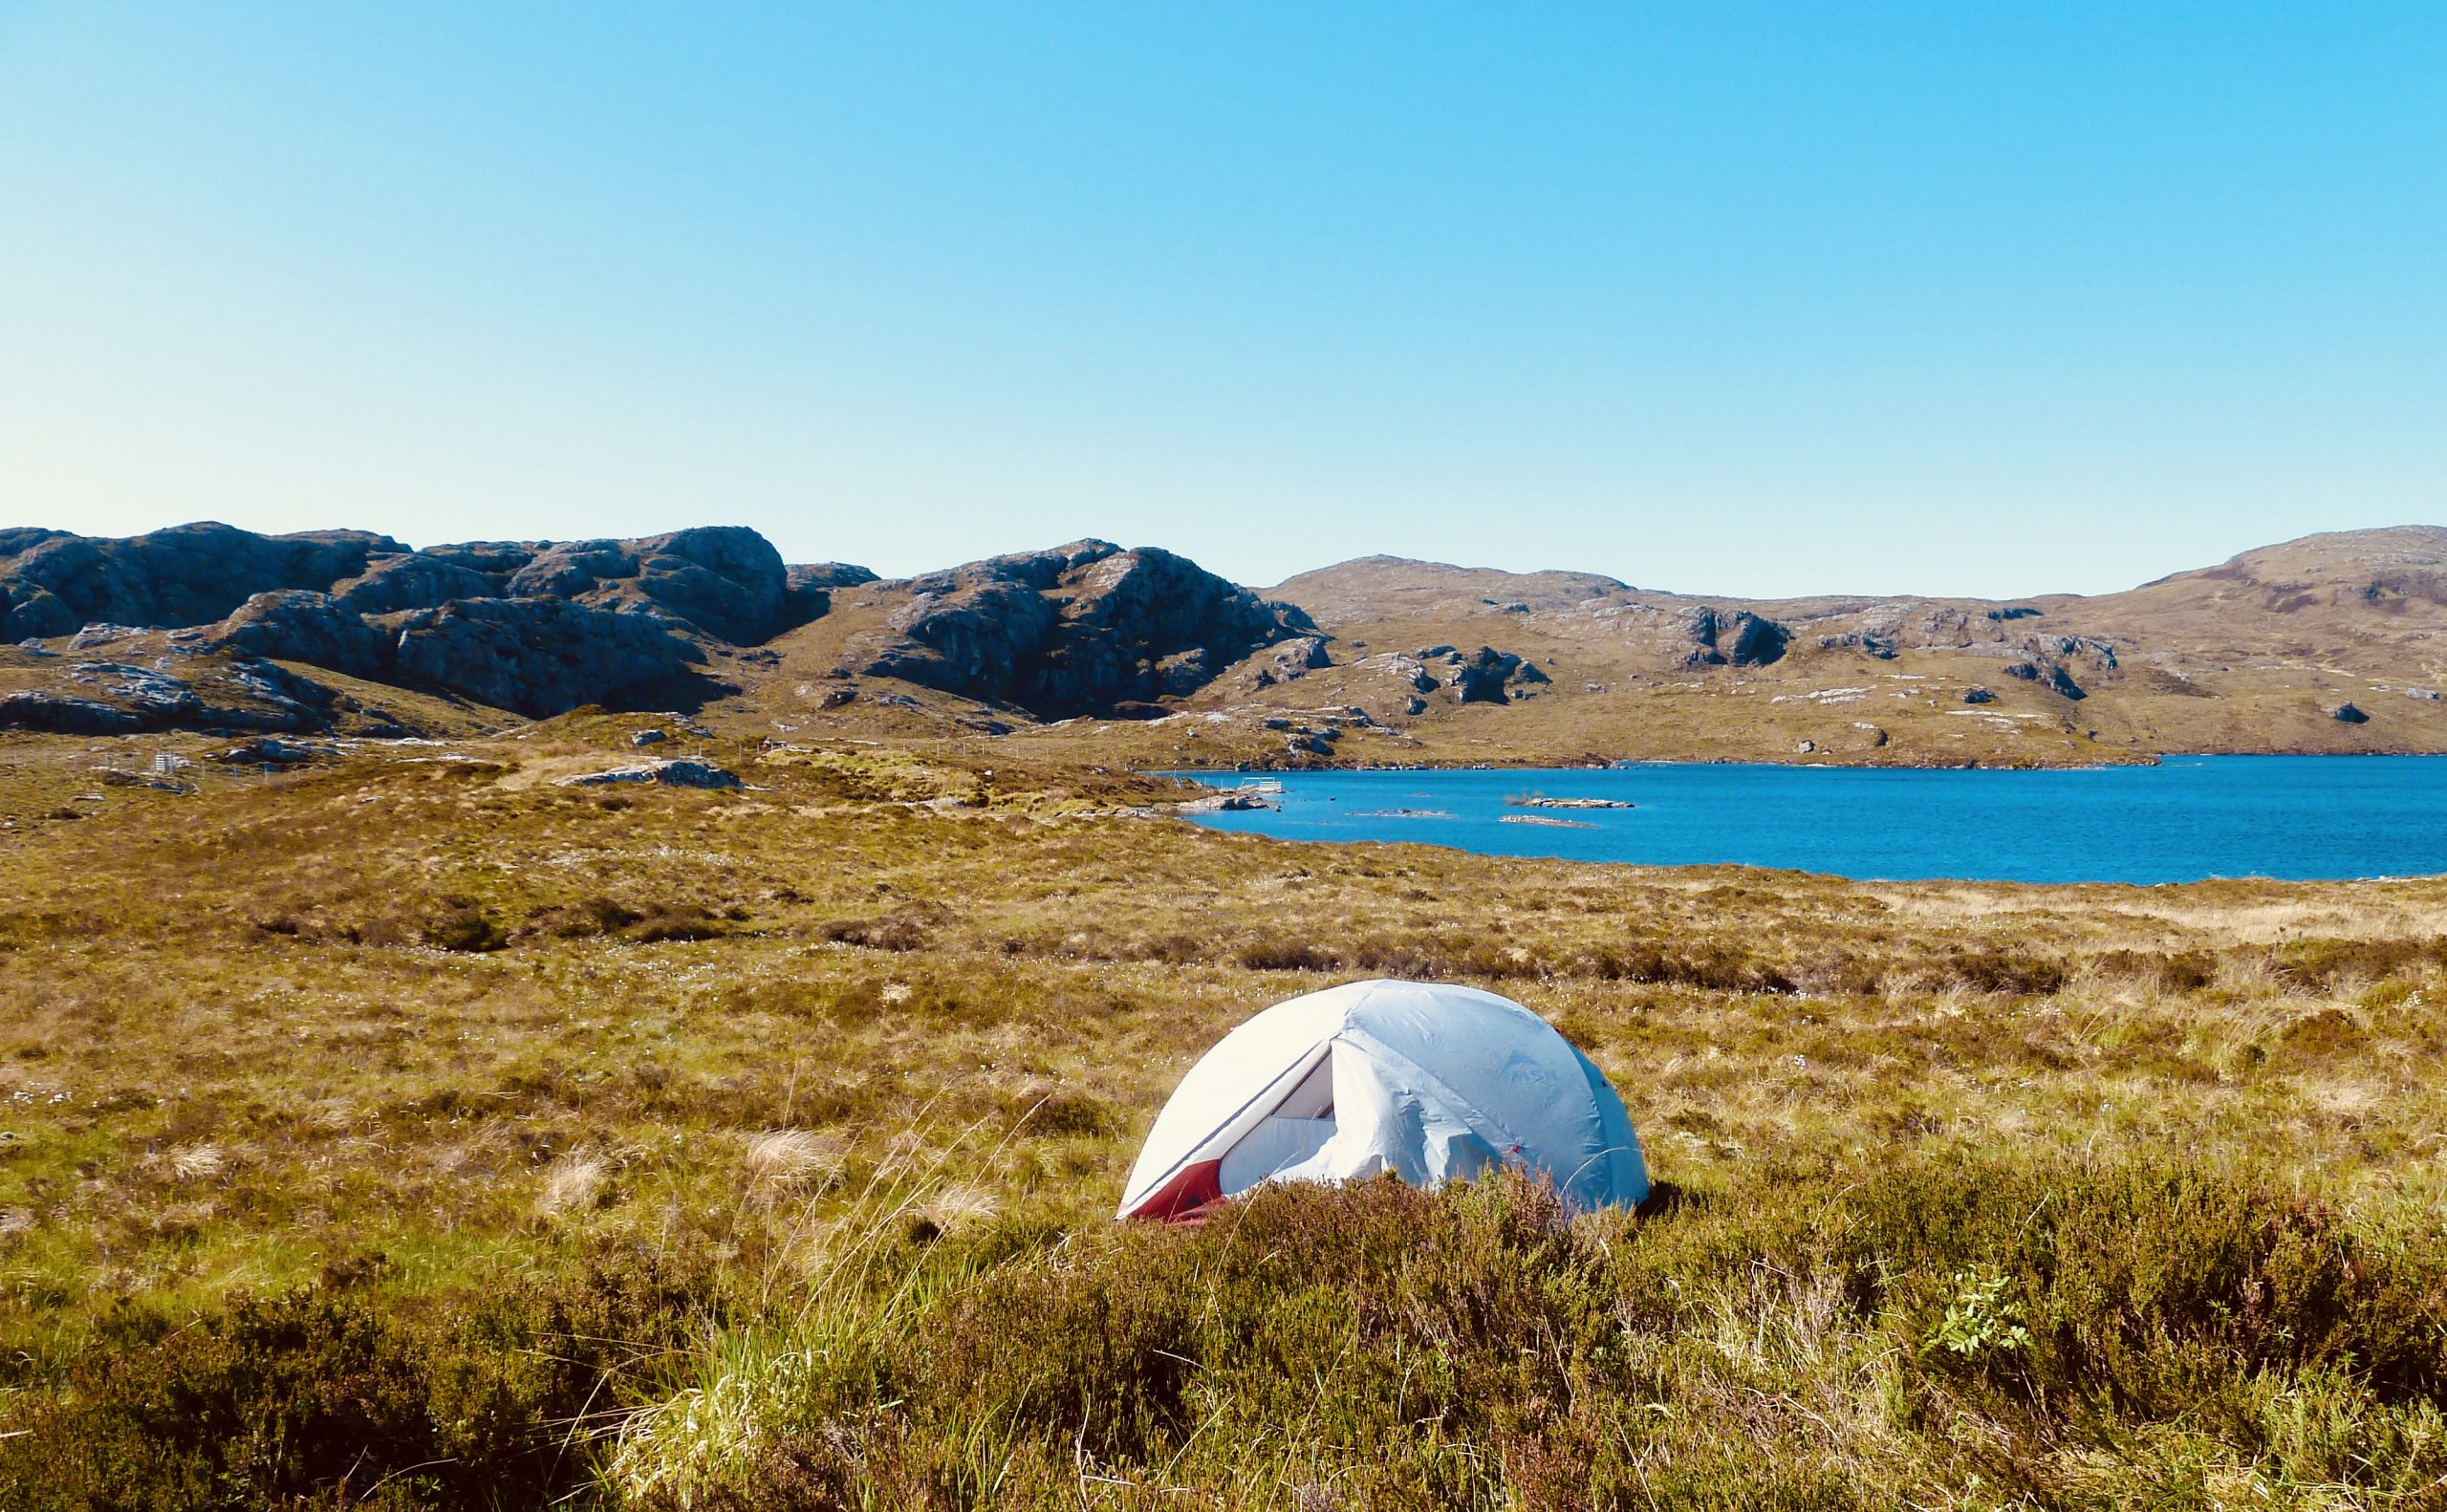
The tent you need for wild camping is a little different from the ones you would take to a festival or a campsite. There are two main reasons for this. Firstly, you need to be able to carry your tent for long distances. It needs to pack small enough to not take too much space in your rucksack and it can’t be too heavy. (You can expect an average 2-man tent to have a packaged weight of 2-3kg). Secondly, the tent needs to be able to withstand quickly changing mountain weather. This means it has to be very waterproof and not collapse when the wind picks up. Furthermore, the tent should be inconspicuous – choose a tent that is a muted colour like green or grey. Brightly coloured tents can be seen for miles on a hillside and make it very hard for you to camp with stealth.
My tent of choice is from MSR
The tent my partner and I use is a few years old MSR Elixir 2. We love this tent and it brings us so much joy every time we take it out! We have lived in it for weeks at a time in the Scottish Highlands and in the Alps. And it has taken everything the weather has thrown at it. At 2.7kg packaged weight it is not the lightest, but it feels robust and it is extremely livable. My partner is tall and fits nicely, whereas I am quite a bit shorter, so often have my rucksack at my feet. And still, have enough space to stretch out! The tent has two porches which give it a lot of extra space. (And make it easy to pop out for a pee in the middle of the night – no need to climb over your partner to get out!)
Choose the right sleeping bag for yourself
The next item we are going to have a look at is your sleeping bag. This is where things get a bit more personal. Are you a cold sleeper or do you tend to overheat easily? Do you sleep on your side or on your back (or on your stomach like me)? How tall are you, and do you have wide shoulders/hips? Getting a sleeping bag that suits you is a bit like buying clothes – it needs to fit your body. Did you know that in many shops you can in fact try sleeping bags before buying?
Sleeping bags usually have either synthetic or down insulation. The main benefit of synthetic insulation is that it can get damp and still keep you warm. It can also be a more ethical choice. Down, on the other hand, is warmer. But wet down = useless down. And therefore a down sleeping bag should always be carried in a separate dry bag to avoid disasters! You can also get compression bags that are very handy and can make your bag pack down significantly smaller. If you are tight on space, compression bags can also be used for your tent (minus the poles).
How to read sleeping bag temperature ratings?
Choosing a sleeping bag with the right temperature rating can be a confusing experience. It is important to remember the ranges are only guidelines designed for an average person. This might not be you! Note also that sleeping bag ratings assume the sleeper has a sleeping mat and is wearing thermals. Here are the normal limits you can find on a sleeping bag label:
- Comfort Limit: the temperature at which an average woman should be able to sleep comfortably.
- Lower Limit: the temperature at which an average man can still sleep through the night (curled up) without shivering (this does not necessarily equal comfort)
- Extreme Limit: the temperature at which an average woman can sleep in the bag (for 6 hours) without getting serious hypothermia. Don’t look at this rating when buying a sleeping bag – it is for emergencies only and has nothing to do with comfort.
For most of us, a 3-season sleeping bag is enough
If you are choosing a sleeping bag that you can use in the UK from Spring through to Autumn – you want a 3 season bag. The temperature rating depends on how warm sleeper you are, whether you mind carrying a heavier bag (more warmth usually equals more weight) and what your budget is. The other equipment you have also has an effect.
I am a cold sleeper and would not want a bag with a comfort limit above 0 degrees Celsius. In fact, I think mine currently has a comfort limit of -11C. It is also important to have a bag that allows you to move in it. And one that isn’t so tight that the down doesn’t have space to loft (which makes you cold). Equally the bag shouldn’t have lots of empty space in it – especially at the feet – as you will struggle to warm this up. To increase your comfort, always make sure you have a dry set of thermals and a pair of clean socks to sleep in, on colder days also add a dry hat. It is important that your clothes are loose-fitting and don’t constrict your blood flow. But don’t be afraid to add more layers if necessary!
Sleeping Mat Plays an Important Role
Having a good sleeping mat is equally important! The most basic option is to carry a foam mat – similar to those used for a yoga class. However, this will not be as comfortable or warm as an inflatable mat which creates some space between you and the ground. Most heat, when camping, is lost through the ground, and it is therefore very important to get a good sleeping mat. It does not need to be huge, or a huge investment, in fact, non-branded inflatable mats can be bought online for very little money. These can work just as well as big brands and expensive options. And if not, they can be improved easily by adding an extra layer of insulation, such as an emergency foil blanket or an insulated picnic blanket, to the system.
Cooking Equipment & Food
Choose a stove you can operate in any conditions
Cooking in the outdoors is a great experience and food is always more delicious when eaten outside! However, for wild camping, you need to find a balance of weight and taste. The most essential bit of kit for cooking outside is a good gas stove.
My cooking system revolves around my trusty old Jetboil – which has come with me on many adventures. I enjoy using a Jetboil because it is fast and easy to light even in difficult weather. It is also safe and steady enough that I can use it in a tent porch (whilst ensuring the necessary air circulation of course). With some planning, a small gas canister lasts me a long time, which means I don’t need to carry much fuel with me for most trips. And it has always been very easy to buy fitting gas canisters in both the UK and the Alps. In saying that, my partner also has an MSR multi-fuel expedition stove which we take with us when we want to cook bigger meals. In the end, it is a question of preference.
Other cooking equipment and tips!
In addition to a stove, I usually pack a camping bowl, mug, and spoon. There is also usually a penknife included in my gear, which I can use to do any chopping or for opening tins. On top of these, I usually bring a small piece of a kitchen sponge to do the dishes with. Although this is not essential and your hands will do the job.
I usually pack a lighter (and sometimes a spare) for lighting my stove, as it is easier in windy conditions than lighting a match. But some liquid fuel stoves require matches to light them, so it’s worth knowing your stove. There are also different types of survival fire starters if you want something different. Or if you are worried about your things getting wet, as they are a relatively reliable method even when damp.
It is also important to plan what to do with any rubbish created from cooking (or anything else). I usually carry a robust zip-lock bag for this purpose. It is easy to put any litter into it, close it up, and pack it into your rucksack or hang it on the outside of it. If you are worried about leaky rubbish in your backpack, you can also get an extra drybag and put the rubbish in that (either in zip-lock bags or straight in).
What To Eat When Camping?
No wild camping gear list is complete without talking about food! Most of the time I am not one of those outdoor cooks who put together a whole steak dinner on a camping stove. But neither do I rely on expensive dehydrated meal bags. Instead, most of the time I prefer easy, cheap, and filling options, which take no time at all to rustle up in the evening.
Dinner ideas for wild camping
Here are some ideas for the types of things you could be taking with you! My evening meals usually include filled pasta, cook-in-the-bag rice, couscous, polenta, or sometimes even super noodles as the base. These options are high on carbs and will fill you up quickly. They are essential for refuelling after a long day! I usually season these with things like pesto or cup-a-soup bags – these include a lot of flavour and bring in some extra calories! And are topped up with protein sources such as tinned beans, tuna, veggie sausages, or falafels.
Focus on energy-rich lunches and snacks
And if my wild camp includes a hike (like it usually does), I will have different things with me for lunches. What I bring depends largely on how much time I have to prep before going. If I have the time, I often make flapjacks or savoury muffins, energy balls, and so on to carry with me. But I am equally happy with sandwiches thrown together at the last minute. I often also carry some fruit – such as apples or easy peelers due to the variety they bring. They can be heavy compared to their calorific value. But they also help me to get in a bit of extra fluid on days when I struggle to drink enough.
And then there are trail snacks. They are energy-dense foods that are easy to eat on the go – such as sweets, chocolate, cereal bars, trail mix, dried fruit, etc. Or energy gels, blocks, and other more specialist products. The purpose of these is to get as much energy in as possible – and believe me you will burn through all of it!
Let me know in the comments if you would like to read a more dedicated article about cooking while camping, or some of the recipes I use for my lunches!
Navigation & Safety Equipment
As responsible outdoor people, we should always carry a reliable method of navigation as a part of our wild camping gear list. For me, this usually means a compass, map, and map case. But it is important to use a method you are comfortable with and know how to use. This could be a GPS, a paper map, or even an app on your phone. But you should note that relying solely on any method of navigation that depends on battery life or signal can leave you in a pickle. Especially in difficult weather conditions, and therefore having a backup is sensible.
Do you know the distress signals?
It is also good to carry an emergency whistle – and in fact, many backpacks come with inbuilt whistles. Just make sure you know where to find it! The widely understood distress signal for mountains in Europe is six short blasts with the whistle within a minute – followed by a break for a minute before repeating the blasts again. This is continued until help arrives. However, signalling SOS in morse code is also understood to mean an emergency. It is three short blasts followed by three long blasts, followed by three short blasts again. However, if you hear repeated whistles on a mountain, it is best to always assume this to be an emergency signal just in case and alert the mountain rescue. It will then be their call to whether they feel it is appropriate to investigate further.
Don’t rely on your phone’s torch for light
It is also good to always carry a headtorch. In the UK the nights get pitch black most of the year, with the exception of a short period during the middle of the summer. So having a good source of light is essential. Having a headtorch allows you to keep your hands free for cooking or pitching your tent. And using the torch on your phone should be the last resort, as it will quickly drain the battery. I always back up a headtorch with a spare set of batteries. As they really have the habit of giving up at the worst possible moments! If you like a little bit of luxury for your camp or like to read before bed, I am also a fan of the little camping lanterns. (Such as this Black Diamond Moji light.) But this is a luxury item rather than an essential!
Bring a first-aid kit
It is also good to carry a small first aid kit for any little mishaps. My personal first-aid kit is very small and usually just consists of some plaster, blister plaster, pain killers, and some kinetic sports tape for sprains. But it is down to you to decide what you might find useful. Depending on where I go to, or what I plan to do, sometimes I also pack a tick remover and a bigger bandage. There is also often some gaffa tape wrapped around walking poles, a water bottle, or some other useful surface in my kit. As this can be used to support your first-aid kit or to solve unexpected gear failures!
Personal Gear & Clothes List for Wild Camping
Finally, let’s talk about clothes! It is very easy to plan your wild camping gear list down to the t – and forget to consider clothing! This is where most people overpack and end up with a much heavier rucksack than they intended. If your trip is only for a couple of days, it is enough to have one set of clothes for walking and one for sleeping. The exception to this rule, which I usually make, is to bring an extra pair of dry socks. Your layers will of course also be affected by the time of the year, the weather, and the amount of walking you plan to do.
I usually either wear or carry these layers for walking in:
- Underwear
- Thermal top
- Fleece
- Mid-layer jacket
- Waterproof jacket
- Walking socks
- Walking boots
- Thermal leggings (if it is cold)
- Leggings/walking trousers
- Waterproof trousers
It is important to have a hat, gloves (multiple pairs), and a buff for keeping your extremities warm. For sleeping a set of thermals and warm socks works well and doesn’t take much space in your rucksack.
Toiletries and personal items
On top of this, there are any personal toiletries and medications you might need. Especially for women, it is sometimes easy to overpack in this department – but really the basics are enough. I recommend bringing a toothbrush and toothpaste, a small moisturiser or a lip balm (helps to calm wind- or sunburn), and sun cream if the weather requires it. A lot of people bring wet wipes for refreshing after a day of walking. But a more ecological option is to bring a little cloth and wet it from your water bottle to wipe your face with.
Make sure you are prepared for toileting in the wild
If you are in the wild, and away from the facilities, for any length of time, it is very important to bring a trowel and some toilet paper for wild camping toilet needs.
Make sure you know what the wild camping etiquette is regarding human waste in the wild. While it is not the topic of this post, here is a quick overview:
For men having a wee is very simple – but for the ladies, this might mean a bit more planning. Some people prefer to use a bit of toilet paper to dry themselves with, some enjoy the drip-and-shake method, and some carry a little pee cloth for the purpose.
As for having a number two in the wild, always dig a hole of at least six inches deep to use as your toilet. Do this at least 30 meters away from any water sources like streams or tarns, and carefully cover the hole when you are done. Don’t have a poo on or near paths (seriously, walk for at least a minute away from the path) or in any shelters such as caves or ruins. (As these are often used to shelter from the rain or the wind – and it takes a long time for a turd to disappear from a cave with no rain washing it out.)
What to do with toilet paper?
When it comes to toilet paper, it is better to not bury this as it will take a long time to decompose buried in the ground, and there is the cumulative effect of a lot of wild campers doing this to consider. Instead either carry it away with you in a ziplock bag or burn it. (Only if you are able to do so with absolutely no risk of the fire spreading and causing damage.) For female sanitary products – these need to always be carried away because even if buried animals tend to dig them up and due to the materials used they do not decompose in nature.
On that note, I hope you have found this article useful and feel a little more prepared for your next camping adventure! Feel free to copy the wild camping gear list for yourself and don’t forget to let me know how it goes! I am considering making a nice printable version of the wild camping gear list at some point (with an option to tick off things). So do let me know if you’d find that useful!
Other things you might find interesting:
For more information, see my Essential Guide for Planning Your First Wild Camp and this Beginner’s Guide to Hiking! For any questions or comments, feel free to reach out through the contact form or on the Hill Days Instagram. I look forward to seeing you out there!

You May Also Like
How to Start Hiking: A Guide to Hiking for Beginners
Essential Guide: How to Wild Camp with Success